
A bright-green jacket
|
|
When I first saw this fabric, I immediately thought that I would like to make a jacket from it. I’m not sure where the idea came from, and I know it’s sort of a bold fabric for a long jacket, but I really liked the idea. I’m really pleased with the results, even if my husband did point out that it, well, “really stands out.” With men, you’re just not really sure what that means.
I think it will make a perfect spring jacket, but I don’t mind wearing it even now. It was a time-consuming project, that’s for sure, but a great opportunity to improve my skills. You really feel like you have accomplished something when you make a lined jacket. I decided to interline this jacket with cotton batting to make it a little warmer, and I plan to post a little more on interlining next week. I also made my own covered buttons, which I will also show you in an upcoming post. |

Supplies
(Click fabrics for direct links for purchase at Warehouse Fabrics Inc.)
|
|
|
|
|
|
|
|
|
|
|
Outer fabric: 3-1/4 yards to 3-7/8 yards, depending on size Lining fabric: 2-1/8 yards to 2-1/2 yards, depending on size for 45″ bolt. The fabric I used was a double width and I used 1-1/4 yards, and had some left over. Interfacing: Pattern calls for 1-1/8 yards to 1-3/8 yards of sew-in, depending on size. I used some lightweight fusible that I had around the house. Interlining: I chose to add some cotton batting for a little added warmth. This was not included in the pattern, and I plan to address jacket interlinings in my next post. I used Warm & White batting off the big roll from my local fabric store. It was a huge width, and I bought 2 yards and had some left over. Optional: shoulder pads. I know, it sounds pretty horrible. But it won’t look like the ’80s. I promise. I used them.
|
|||


A few notes on hemming lined sleeves
Do you ever wonder how to deal with the sleeve hems on a lined sleeve? The instructions are never very specific on this and for a long time, I didn’t quite get it. I don’t know if this is the best way, but it’s my way. Please click the pictures for bigger views, if needed.
|
|
First (not shown) turn up the sleeve hem the amount required by pattern or for the proper length for you and sew in place. I did not concern myself with finishing the edge; I just folded it up and sewed. You can see the interlining here, but I actually made sure the interlining came short of the fold at the bottom of the sleeve, because I wanted it nice and crisp looking.
Turn up the sleeve hem so that you can access the seam allowance (left). I had my jacket hanging on the dress form. If you don’t have a dress form, consider hanging it on a hanger so you can see how things will hang. |
|
|
Next, I brought up the sleeve hem and turned the raw edge over just a tiny bit, maybe a quarter-inch. Then I slip-stitched it to the seam allowance of the outer jacket. It’s best to start by lining up the sleeve seams. Yeah, I learned that the hard way and had to start over. Even if this isn’t perfect, it’s nothing that anybody will see. Unless you have strange friends who inspect the insides of your clothing. I, more than anybody, like the inside of my garments to look presentable, but this is one area that is hard to see.
Please note that I have just stuck the needle in the fabric as a holding spot. I was not sewing there, but rather an inch or so below. |
|
|
I have slip-stitched all the way around. |
|
|
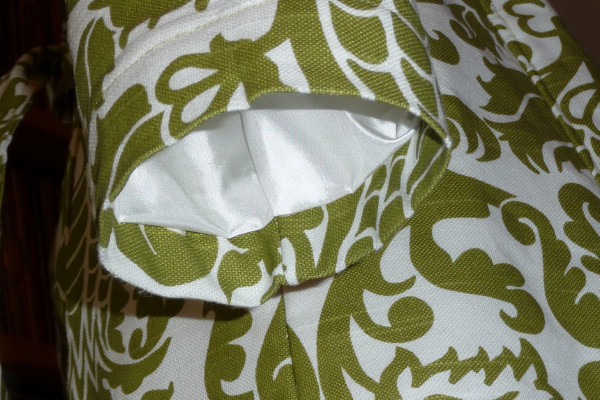
Flip your sleeve back down and right-side out. Smooth out the lining and press. What I’m trying to show you here is that the lining will fall down in a fold past where it is slip-stitched to the sleeve seam allowance. It has a nice, little give. |
|
|
Yay! I didn’t even press it yet, and it looks pretty nice. |


|
|
|
|
|


