Add an exposed zipper to a garment
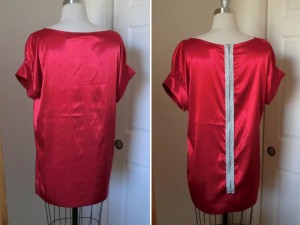 I’ve been asked to do a tutorial about exposed zippers, which are a popular way to add pizazz to a garment. Basically, it just means adding a zipper right on top of the fabric. Normally, of course, you try to hide most of the zipper tape inside. But the exposed zipper is just that … exposed. And that makes it really, really easy to do.
A few things: You can do this on an existing garment or on one you are making. You can do it where there is no seam (like my example) or on a seam. You can have your zipper extend from top to bottom, or it can stop somewhere in the middle.
I felt this look would be nicest on a shift type of dress or shirt, so I picked one up at the thrift store in a shiny red satin and then found a snazzy silver zipper.
The Process
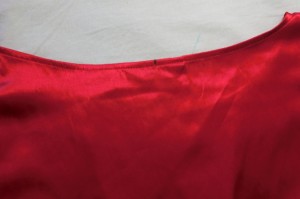
Mark the center of the top of your garment.
Mark the center of the bottom of the garment. You might mark the center in the middle, for good measure. No pun intended. Seriously.

If your zipper is being applied where there is no current seam to guide you, draw a line down the center so you know where to place the zipper. Stop the line wherever the zipper stops, which may mean it goes to the bottom of the garment.
Pin the zipper tape to the garment, with the top of the teeth at the top of the garment edge. Make sure you’re only pinning through the top piece of fabric.
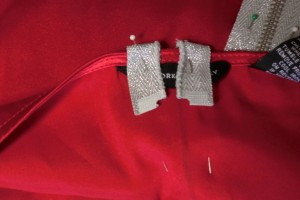
Fold the top of the zipper tape over the top of the garment and secure.

Sew down each outer edge of the zipper tape. Don’t forget to keep checking that the layer of fabric underneath (the other side of the garment) is not getting caught in the stitching. I had to do frequent adjusting.

It will look like this!
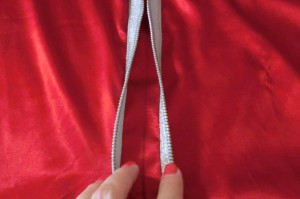
Open your zipper. Now you’ll cut the fabric on that line (or open it on the seam, if you did it that way). Be sure not to cut the other layer of fabric!!
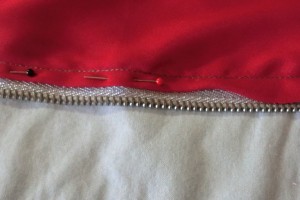
On the inside, fold under the raw edge and pin. Then sew a little ways over from the first row of stitching. I believe I sewed from the other side, which means that the pins are on the wrong side in this photo, but whatever works for you.
Other views