 [1] [1] |
A lot of times inexperienced sewers want to make some basic curtains to dress up their windows, but they just don’t know where to start. It can seem like an intimidating job, and certainly such a project can range from basic panel curtains with a rod pocket to elaborate draperies. If you’re looking for simplicity, this tutorial is for you. |
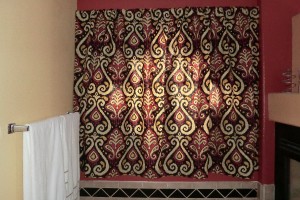
| I hope to make this particular tutorial with an inexperienced sewer in mind. If you have any questions at all, please don’t hesitate to contact me via the contact form on the blog or by leaving a comment. This curtain is very basic. It is designed for a standard sized window where you can use two single widths of fabric (most home dec fabric is around 55″ wide), one for each panel. Then you just hem it up and you’re set. For hanging, this has a rod pocket, which is a simple casing to slide the rod into. Also see our other curtain-related tutorials: lined and interlined grommet curtains (blackout) [2]; simple valance [3]. Admittedly, this is an odd window. I live in New Mexico, and for some reason lots of homebuilders seem to feel the need to add Southwestern touches to homes. I find it rather annoying because it limits your decor options. We have this glass block window in our bathroom over the tub. It faces east and so it’s very bright in the mornings. Even though it’s an odd window to put curtains on, I thought it might be helpful to block some of the light, especially since our bathroom is open to the bedroom, so we can’t just close the door while we are sleeping. I also had the added challenge of it being situated in a weird spot that made it hard to mount a standard curtain rod, so I used a tension rod. |
Supplies
(Click fabrics for direct links for purchase at Warehouse Fabrics Inc.)
|
|

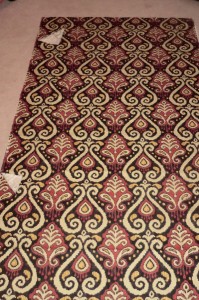
| I’ll walk you through your calculations. For my window, I used 4.5 yards of fabric. That included extra so that I could match repeats. Repeat refers to how often the fabric pattern repeats itself. On something like a curtain, you’re concerned with vertical repeat (this information is provided in our product listings). Considering the vertical repeat allows me to make sure that the pattern lines up from curtain panel to curtain panel and looks even. Some fabrics may not require this, especially if they have a particularly random print. My vertical repeat on Zanzibar Ebony [4] is 25.25″ (like I said, this information is located in the fabric description). So, here’s what you do: Calculate how long you want your curtain to be. Add 8″ for the bottom hem and 3.5″ for the top hem (this curtain features a basic rod pocket, meaning that it’s just a casing that you slip over the rod. Very basic and simple to do!). So that’s the final length of ONE curtain panel. You need two, so double that. Then add the vertical repeat one time. My curtain was 54″+8″ hem+3.5″ top hem = 65.5″ I need two panels that long, so I’ll double that: 65.5″x2=131″ Then I add the vertical repeat once: 131″+25.25″=156.25″ total length. Since there are 36″ in a yard, I needed 4.34 yards of fabric.I’ll show you more about this below. If you were to need to match the prints and actually sew several widths together to form your panel, then you could use this tutorial [5] on pattern matching. |
The process
 |
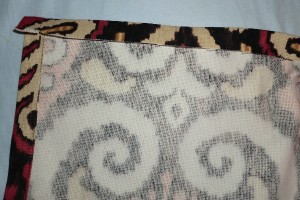
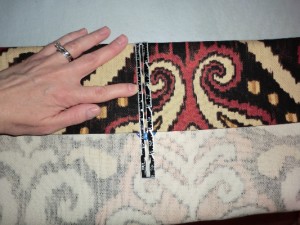
From your yardage, first ensure that your top edge is squared up, meaning that it’s not skewed or uneven. Then measure down each side and mark the length that you need. A 60″ ruler found in many hardware stores is very useful. See this post [6] for more about that. Once you cut your first piece, which is one of your two panels, you’ll want to line up the pattern so the second piece looks the same. In this photo, I have placed my first cut of fabric on top of the remaining piece and lined it up so the patterns match. I turned the corners of my top piece so that you could see where it starts and stops and how the patterns match. Cut out your second panel using the first one as a “pattern.” |
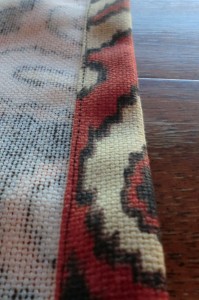 |
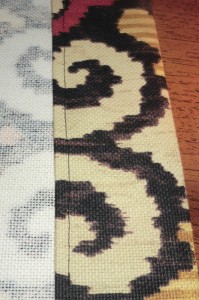
Hem the sides of your curtain panels by folding under and pressing 1″. Then fold over and press another 1″ and pin in place. Then sew close to the edge. |
 |
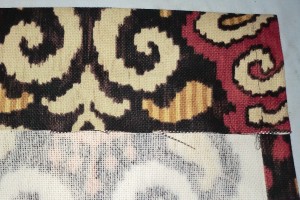
Now hem the top of the curtains and make the rod pocket. First, determine which way is up and make sure you do both panels the same. Some fabrics are the same both directions, some aren’t. Some have an obvious up/down, or some, like mine in this project, could go either way. Fold under 1/2″ and press. |
 |
Now fold over another 2.5″ and press and pin. Incidentally, if you’re not much of a sewer and are unfamiliar with these little 6″ rulers, they are awesome for hemming. You can set the little blue tab to whatever length you want to help line things up evenly. |
 |
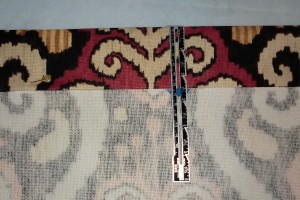
Now sew the top edge close to the fold. When you fold over the top edge and sew, you do not sew the ends at all. That way you have a place to slip the rod through. |
 |
To hem the bottom, turn under and press 4″. |
 |
Then turn under and press and pin another 4″. This creates a hem with a bit of weight, which looks nice. Now sew close to the fold. That’s it! You’re done. Isn’t that easy? You don’t have to be an experienced sewer to do a project like this. |
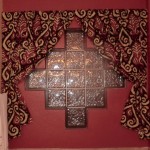
Other views
(Click for bigger views)
|
|