
How to insert a pocket in a seam – even in clothes you already have

Of all the projects we post to our Pinterest, “Adding Pockets to Any Garment” has gotten a whole lot of attention. So, in response, I’d like to first thank Robin Vines Smith for the original publication, and offer an update based on a similar project.
Like Robin said, most people think adding a pocket to a garment, retail or otherwise is simply not possible or too difficult. Fact is, adding pockets to a garment isn’t all that difficult. To be truthful, it’s easier when your garment has a side seam. But you can do this with a little tweeking even to a garment without side seams. It’s riskier if you’re not familiar with how pockets are installed, but still doable.
In this simple tutorial, I’ve added pockets to a dress I created a while back that just needed a place to hide my hands! Read on for instructions and a printable pattern you can use if you need it.
How to Add Pockets to a Pre-made Garment
Project Difficulty: Easy/Beginner-Medium
Some sewing experience needed
Supplies
Scissors
1/2 yd fabric of your choice (similar to the weight of your garment)
Sewing Machine
Pocket Pattern cut two for each pocket you want to make.

Step 1
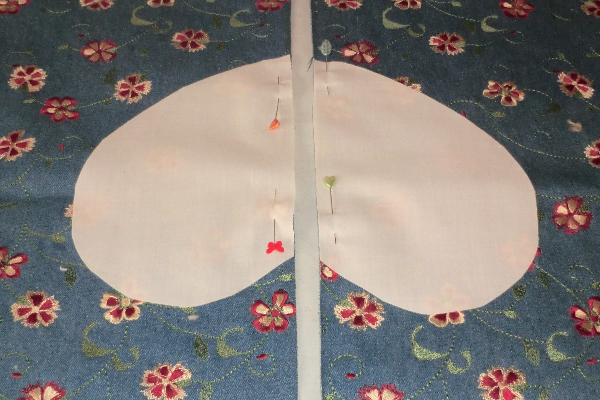
Print pocket pattern and cut out. If you want a larger or smaller pocket, adjust accordingly. Measure the length of the straight edge of your pattern. Try your garment on and place your hands where a pocket feels most natural. Mark that spot and place a pin on each side of your garment. You will want to measure from the waist on each side to make certain your pockets are in the same place. You’d look kinda funny with lopsided pockets…unless that’s your look. In which case, you do you.

Taking the measurement of your pocket pattern, place the ruler at the top of your pocket placement and transfer that measurement to placing a pin 1/2 inch above and below. (Fig 1)
Step 2
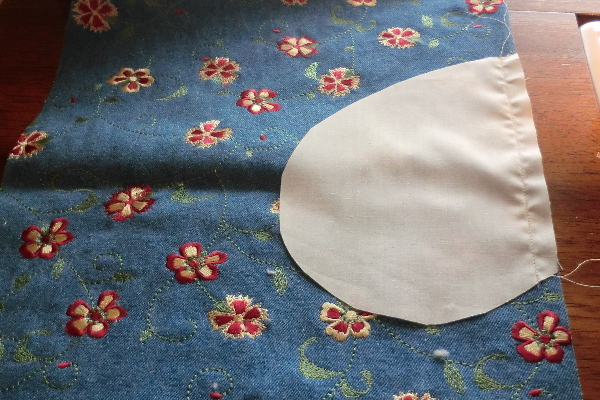
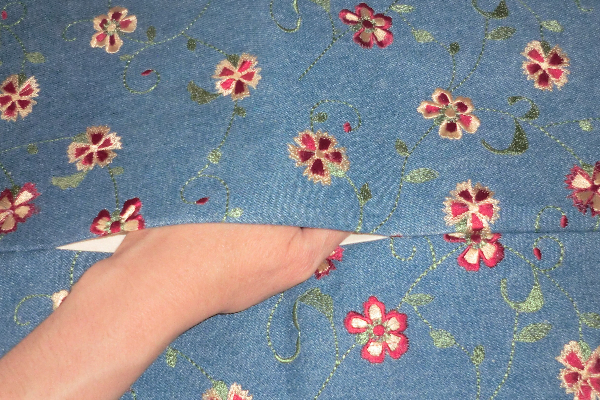
Turn your garment wrong side out and carefully, CAREFULLY open your side seams up from pin to pin. Your opening will be 1 inch larger than the pocket piece.
Step 3
Fold your fabric in half with the right side up. Place pocket patterns on your fabric. Cut four. The bottom of the heart should be the bottom of your fabric design unless it’s a solid, of course!
Step 4
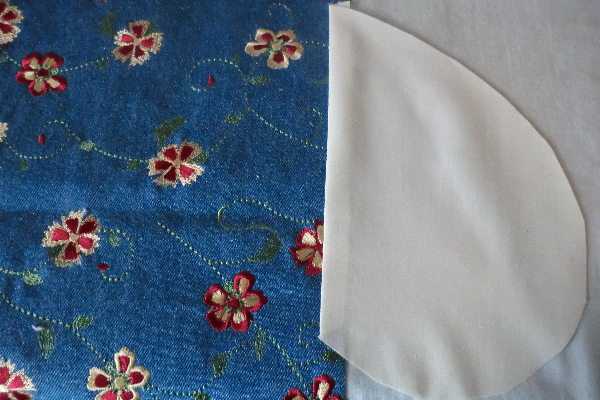
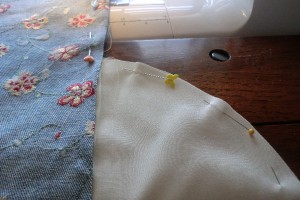
Lay your garment down with the open seam in the middle Right sides together, place one cut out pocket along the seam making sure you leave 1/2 inch above and below. Align the straight edge of your pocket piece to the seam edge with the heart top facing down the garment. (Fig 2a-b) Looking at your garment, each side together will look like an upside down heart. Pin along the edge. Stitch a 5/8 inch seam as shown in Fig 3.

Step 5
Fold along stitch line away from garment and press. (Fig 5)
Step 6
(Fig 6a-b) Turn inside out. Placing right sides of pocket together, pin. Starting at the seam you opened up 1/2 inch above, stitch to the 5/8 inch point on the pocket. Leaving the needle down, pivot and continue around the pocket curve stopping at the bottom, leave the needle down, pivot and stitch until the 1/2 inch mark just like you did at the top.

Step 7
Turn right side out and press the outside and the inside of your pockets flat making a good crease. (Fig 7)

Step 8
Enjoy those pockets! Look casual, strike a pose. Rock those pockets!
Sew ‘n piece my friends!
NOTE: Some have asked about adding pockets when there is no side seam. You can do this. It’s more difficult, but still doable. Here’s a great link to show you how.

