
Recovering lamp shades
 |
Do you have a lamp that needs a makeover? You can do it yourself at the fraction of the cost of buying a fancy new lamp shade. All you need is some fabric that matches your decor, ribbon and trim, if desired and something to stick it all on with. Take advantage of thrift and discount stores for cheap lamp shades and then get crafty. |
Supplies
(Click fabrics for direct links for purchase at Warehouse Fabrics Inc.)
|
|
|
|
|
|
|
|
|
|


The process
 |
Start with a large piece of paper. You’re going to draw your lamp shade pattern.
I did two lamp shades of different shapes. I will be hopping back and forth a bit below. |
 |
This lamp shade is bigger on the bottom than on the top, so it’s going to turn as I roll it.
Start at the bottom of the left side of the paper and line the side seam of the shade up with the edge of the paper. If you look closely, it looks like my seam is over about an inch to the right. But the seam overlaps, so on the outside of the shade, it is actually aligned. |
 |
Start tracing along the bottom of the shade as you roll it. Go back to the start and do the same with the top of the shade. I am using pencil, so it’s hard to see here. |
 |
I have gone over my pencil with a marker to make it easier to see. This is the basic shape you’ll get. You’ll want to add extra to the edges so you have something to fold over the top and bottom, and a bit of overlap on the seam. |
 |
I have switched now to my fabric for the cylindrical lamp shade. You can see that it is just a big rectangle. Although the stripes aren’t perfectly straight on this fabric, I did my best to line it up along the stripes. |
 |
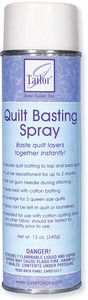
This is the cylindrical shade again. I will use quilt basting spray to attach my fabric to it. I like this spray because it is not permanent and allows for readjustment. You will glue the edges with hot glue in a bit, so it’s OK if this part isn’t held down quite as tightly. |
 |
Smooth it as much as you can as you go. You might want to be sure your fabric is pressed smooth first. Also, line up any stripes as so when you get to the ends.
|
 |
I did the same with my other shade. (I used fabric from my stash on this one, but I think it might be out of stock now. Sorry.) |
 |
Using a hot glue gun, fold over the top and bottom edges. |
 |
Like so. |
 |
On your side seam, you can either add some sort of trim, like I did here, or you can try another method. With a thin fabric, you can simply fold over the raw edge and glue in place. Or you can make a piece of trim from the same fabric and press in the raw edges and glue it on. |
 |
Add any other trim desired. Isn’t this the cutest!? |
 |
Fold over the edge of the trim and glue in place so it won’t ravel. |
 |
I used more of the trim on the inner edge to cover the edges I glued over. You can also use ribbon. Where I met up with a support wire, I simply cut the fabric a little and pushed it around the wire. I dabbed hot glue to stop any fraying. |
Other views
(Click for bigger views)
 |
 |

